Badminton is a popular game for people of all ages, and having your badminton net is a great way to practice and enjoy the game in the comfort of your home.
But, if you don’t have the funds to buy one, you can make a badminton net with simple tools and materials.
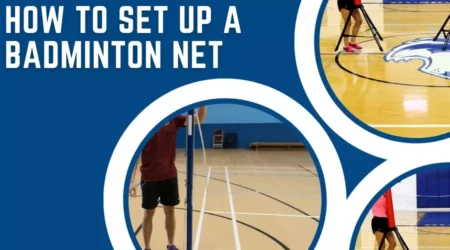
In this step-by-step guide, you will learn how to make a badminton net from your home.
With this guide, you will be able to make a durable badminton net that is the same quality as one purchased from a store. So, grab your tools and materials, and let’s get started!
Gather the necessary materials and tools

There are a few materials and tools that you will need to make a badminton net. They are listed below.
- PVC pipes. You will need four 90-degree PVC pipes, 12-inch long pipes, and four 24-inch long pipes. You can get PVC pipes from a hardware store or home improvement store. They are inexpensive and easy to find. The 90-degree PVC pipes are used to make the frame of the net. The 12-inch long pipes are used to make the base of the net. The 24-inch long pipes are used to connect the 90-degree pipes.
- PVC pipe joints. You will need a few PVC pipe joints to connect the PVC pipes. You can get them from a hardware store or home improvement store.
- Sharp knife. You will need a sharp knife to cut the PVC pipes.
- Measuring tape. You will need a measuring tape to measure and mark the location of the badminton net. – Level. You will need a level to make the PVC pipes and net straight and even.
Measure and mark the location

First, mark the location of the badminton net on the wall. The badminton net should be five feet high and six feet wide.
You can choose another height and width if you desire. Next, use a measuring tape to measure and mark the location of the support beams.
The support beams should be around 3 to 4.5 feet long. Mark the location of the support beams on the wall. Ensure the support beams are set in the middle of the badminton net.
Use the level to make the support beams and the badminton net straight and even.
Cut the PVC pipes to the desired size

Now, cut the PVC pipes to the desired size. Remember that the 12-inch long PVC pipes will make the base of the badminton net, and the 24-inch long PVC pipes will connect the 90-degree PVC pipes.
The 90-degree PVC pipes will make the frame of the net. Note that the PVC pipes will be cut to two different lengths. Cut the 90-degree PVC pipes to eight inches long and the 12-inch long PVC pipes to two inches long.
After you cut the PVC pipes, make sure the edges are smooth. You can sand them down or use a file if they are not soft.
Cut the PVC pipes at the marked location, so they are set in the middle of the support beams.
Assemble the frame

Use PVC pipe joints to assemble the frame of the net. First, attach the 24-inch long PVC pipe to the 90-degree PVC pipe.
Then, attach the second 90-degree PVC pipe to the other end of the 24-inch long PVC pipe. Next, attach the 12-inch long PVC pipe to the end of the second 90-degree PVC pipe.
Now, you will have the frame of the net. You can use the knife to cut the PVC pipe joints so that the edge of the net is secured and tight.
Attach the net to the frame

Cut the badminton net fabric to the desired size. It should be five feet high and six feet wide. You can use scissors to cut the fabric.
Now, attach the net fabric to the frame of the net. You can use a needle and a thread to do so.
Install the badminton net

Now, attach the frame of the badminton net to the support beams. You can use the net badminton fabric to make the rope tighter.
Tie the rope tightly to the frame and the support beams. Now, you have a badminton net at home!
Test the badminton net

Now, test the badminton net to see if it is durable and if the fabric is strong enough.
You can do this with a friend or family member. You can also practice playing badminton with the net.
FAQS
What can you use for a badminton net?
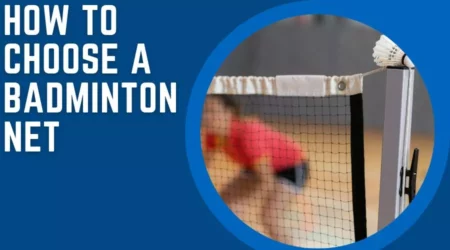
The most common material used for badminton nets is nylon. Nylon is lightweight, durable, and easily stored away when not in use.
It has a higher strength-to-weight ratio than other materials, meaning it won’t sag or stretch over time. Nylon also resists damage from UV rays, so it won’t fade or deteriorate as quickly as other materials.
Another material that can be used for badminton nets is Cordura or polyester mesh.
These meshes are highly durable and have high tensile strength, meaning they can withstand a lot of wear and tear without stretching or sagging. They are also lightweight so that they won’t weigh down the net.
Finally, you can also use metal for a badminton net. Metal nets are much more durable than nylon or mesh nets but are also heavier and more expensive.
Metal nets are often used in professional badminton tournaments because they can withstand much use without deteriorating.
No matter what material you choose, ensure the net is secured correctly to the court or posts. If not, the net can quickly come down or become loose during play.
How do you build a badminton net?
Building a badminton net doesn’t have to be complicated! It’s pretty straightforward, and you can do it in just a few steps.
First, you’ll need to set up the posts. To do this, you’ll need two poles that are sturdy and free-standing, such as metal poles. Place these poles at least 5 feet apart and ensure they stand straight and securely anchored in the ground.
Once the posts are in place, you’ll need to attach the net. Begin by tying one end of the net around the top of one of the posts. Then, take the other end and stretch it across to the other post, making sure it is taut. Securely tie the second end of the net around the top of the other post.
Next, you’ll need to attach the bottom of the net to both poles. Measure out 5 feet from the bottom of each post and mark the spot with a piece of chalk. Then, tie one end of the net to one standing at the chalk mark and pull it across to the other post. Securely connect the other end of the net at the second post’s chalk mark.
Finally, your badminton net is ready to use! Just ensure that it is even on both sides and securely tied at each post. With these steps, you should have a well-built badminton net ready for fun games!